# Using the SDK
On the project creation screen, select the Virtual Reality template to create your project.

If SteamVR and DivingStation setup is correctly completed, running VR Preview will enable hand tracking.
# Accessing the ContactGlove API
Here, we explain how to access the ContactGlove API from Blueprint.
First, set the CGPawn located in the Plugins/ContactGlovePlugin/Content/Blueprints/ folder
as the Default Pawn Class.
Navigate to Project Settings -> Maps & Modes and set Default Pawn Class under Default Modes to CGPawn.
# ContactGloveComponent
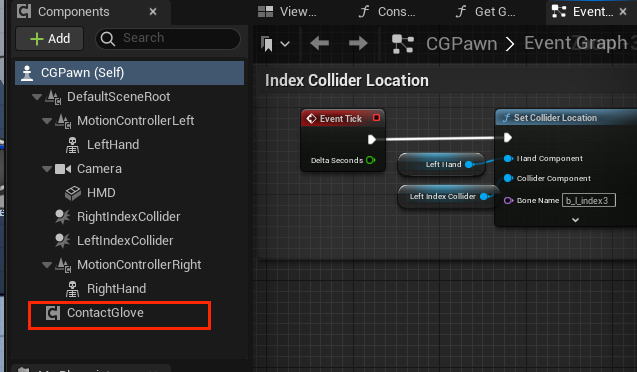
CGPawn owns the ContactGloveComponent.
Access to each ContactGlove data is done through this component.
(You can add the ContactGloveComponent from the Add button.)
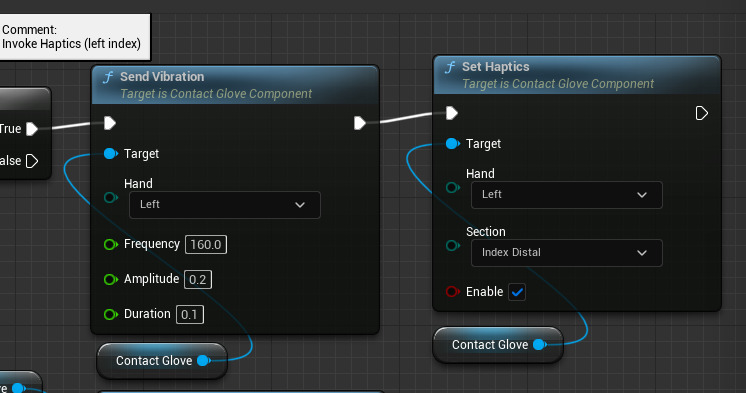
For example, use it as shown in the above image.
The left Send Vibration node provides vibration to the left hand for 0.1 seconds,
followed by activating the tactile module on the left index finger using the right Set Haptics node.
# Events
ContactGloveComponent includes several events triggered when receiving data from DivingStation or when there is a change in button inputs.
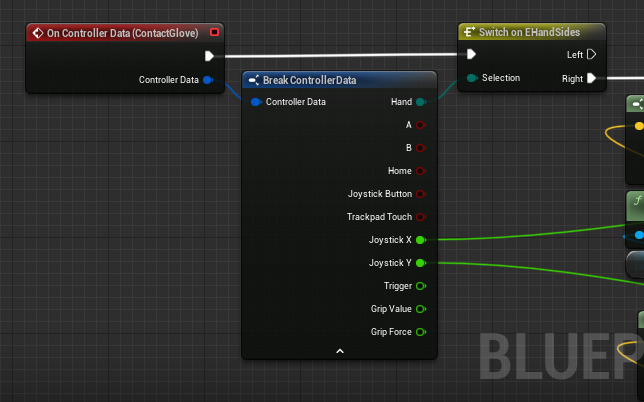
The OnControllerData event is called when there is a change in controller information.
A structure containing all controller information called ControllerData is passed,
and you use Break ControllerData to extract the necessary information.
# Animation
Hand visualization is handled by CGPawner > {Left, Right}Hand > SkeletalMeshComponent > Hand_L_Skeleton_Anim.
This class is located in the Plugins/ContactGlovePlugin/Content/Mesh/ folder.
Open this Animation Blueprint, and when you open AnimGraph, you'll see something like the following:
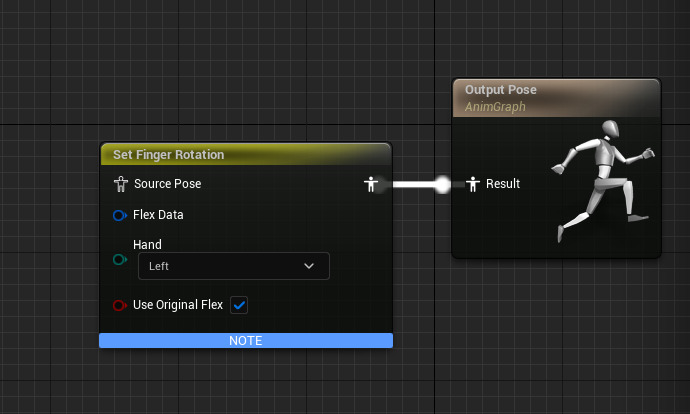
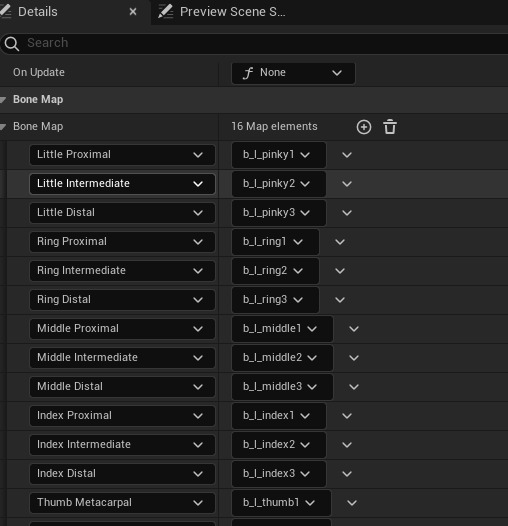
The SetFingerRotation node retrieves the degree of bending of the hand from DivingStation and applies it to the bone.
However, you need to specify details such as the corresponding bone and maximum rotation in the Details.
For more detailed usage, refer to the documentation.
← Setup Documentation →